
Demo and source code
You can view a working demo here, as well as the source code on Github.
Introduction
Say you’re creating a signup screen for an Ionic Angular app and it’s required the user be able to upload and crop a profile image, how do you go about this? We’ll cover such a use case in this post.
Creating the project
We’ll need an Ionic Angular project to create the modal in, so let’s go ahead and create it.
- Install ionic
npm install -g @ionic/cli
- Create the project
ionic start imageCrop blank
Setting up the image upload input
Inside src/app/home, let’s go ahead and clear the contents of home.page.html and home.page.scss, then add markup and some styles for the image upload input.
Update home.page.html:
<ion-content>
  <ion-grid>
    <ion-row>
      <ion-col sizeSm="4" offsetXs="4">

        <ion-label position="stacked">Profile image</ion-label>
        <ion-input type="file" clearInput (change)="processFile($event)"></ion-input>

      </ion-col>
    </ion-row>
  </ion-grid>
</ion-content>
Update home.page.scss:
ion-input[type="file"] {
  background: rgba(230, 230, 230, 1);
  padding: 1em;
}
Now run the command ionic serve, our app should look like this:

Next, let’s create a service that’ll use the FileReader API to retrieve the selected image. We’ll pass it the DOM event that we are capturing from the File input field in home.page.html.
Let’s generate the service with the command:
ionic generate service services/image
Then flesh it out as below.
import { Injectable } from '@angular/core';
import {Observable} from 'rxjs';

@Injectable({
  providedIn: 'root'
})
export class ImageService {

  /**
   * Creates a FileReader API object
   */
  private fileReader: FileReader = new FileReader();

  constructor() { }

  /**
   * Uses the FileReader API to capture the input field event, retrieve the selected image
   * and return that as a base64 data URL courtesy of an Observable
   *
   * @param event The DOM event that we are capturing from the File input field
   */
  handleImageSelection(event: Event): Observable<string> {
    const file = (<HTMLInputElement>event.target).files[0];

    this.fileReader.readAsDataURL(file);
    return new Observable((observer) => {
      this.fileReader.onloadend = () => {
        observer.next(<string>this.fileReader.result);
        observer.complete();
      };
    });
  }
}
Adding ngx-image-cropper
Having done that, let’s add ngx-image-cropper, an image cropper for Angular. Run the command:
npm install ngx-image-cropper --save
Creating the image-crop modal component
Next, let’s create a modal we’ll present to the user for image cropping after selection through the File input.
ionic generate component image-crop-modal
Update image-crop-modal/image-crop-modal.component.html with the following snippet:
<ion-header>
  <ion-toolbar color="primary">
    <ion-buttons slot="end">
      <ion-button (click)="dismissModal()">
        <ion-icon slot="icon-only" name="close"></ion-icon>
      </ion-button>
    </ion-buttons>
    <ion-title>Resize Image</ion-title>
  </ion-toolbar>
</ion-header>

<ion-content padding>
  <ion-row>
    <ion-col>
      <image-cropper
              [imageBase64]="imageBase64"
              [maintainAspectRatio]="true"
              [aspectRatio]="4 / 4"
              [resizeToWidth]="0"
              format="png"
              (imageCropped)="imageCropped($event)">

      </image-cropper>
    </ion-col>
  </ion-row>
  <ion-row>
    <ion-col></ion-col>
  </ion-row>
</ion-content>

<ion-footer>
  <ion-toolbar>
    <ion-buttons slot="end">
      <ion-button color="primary"
                  [disabled]="!imageBase64"
                  (click)="dismissModal(croppedImageBase64)">
        Continue
      </ion-button>
    </ion-buttons>
  </ion-toolbar>
</ion-footer>
Then update image-crop-modal/image-crop-modal.component.ts as follows:
import {ChangeDetectionStrategy, Component, Input, NgModule, OnInit} from '@angular/core';
import {IonicModule, ModalController} from '@ionic/angular';
import {ImageCroppedEvent, ImageCropperModule} from 'ngx-image-cropper';
import {CommonModule} from '@angular/common';

@Component({
  selector: 'app-image-crop-modal',
  templateUrl: './image-crop-modal.component.html',
  styleUrls: ['./image-crop-modal.component.scss'],
  changeDetection: ChangeDetectionStrategy.OnPush,
})
export class ImageCropModalComponent implements OnInit {

  private croppedImageBase64 = '';
  /**
   * Image to be cropped as a base64 string.
   * Should be passed in from the component calling this modal.
   */
  @Input() imageBase64 = '';

  constructor(
      private modalController: ModalController
  ) { }

  ngOnInit() {
    //
  }

  imageCropped(event: ImageCroppedEvent) {
    this.croppedImageBase64 = event.base64;
  }

  dismissModal(croppedImageBase64?: string) {
    this.modalController.dismiss({croppedImageBase64});
  }

}

@NgModule({
  imports: [
    CommonModule,
    IonicModule,
    ImageCropperModule,
  ],
  declarations: [ImageCropModalComponent]
})
class ImageCropModalModule {
}
You should note Ionic 5 brings full support for Ivy, Angular’s new renderer. Ivy enables apps to only require pieces of the renderer that they actually need, instead of the whole thing. This means that our final output will be smaller, which is better for load performance. Read more here.
Building with Ivy equally allow us create components without necessarily adding them to a module, and the ability to lazy load them. I highly recommend you read this article if you’d like to learn more.
Creating an image-crop modal service
To call the modal after the user selects a profile image, let’s create a service that takes care of lazy-loading and presenting it, then returning the result after a cropping operation.
ionic generate service services/image-crop
The service’s content:
import {Injectable} from '@angular/core';
import {ModalController} from '@ionic/angular';

@Injectable({
  providedIn: 'root'
})
export class ImageCropModalService {

  constructor(
      public modalController: ModalController,
  ) { }

  async show(imageBase64: string): Promise<string | null> {
    // Lazy load the image crop modal (an Angular Ivy feature)
    const { ImageCropModalComponent } = await import(`../image-crop-modal/image-crop-modal.component`);

    const modal: HTMLIonModalElement = await this.modalController.create({
      component: ImageCropModalComponent,
      componentProps: {
        imageBase64
      },
    });

    await modal.present();

    const result = await modal.onWillDismiss();

    if (result.data && result.data.croppedImageBase64) {
      return result.data.croppedImageBase64;
    } else {
      return null;
    }
  }
}
Applying the image-crop modal and service
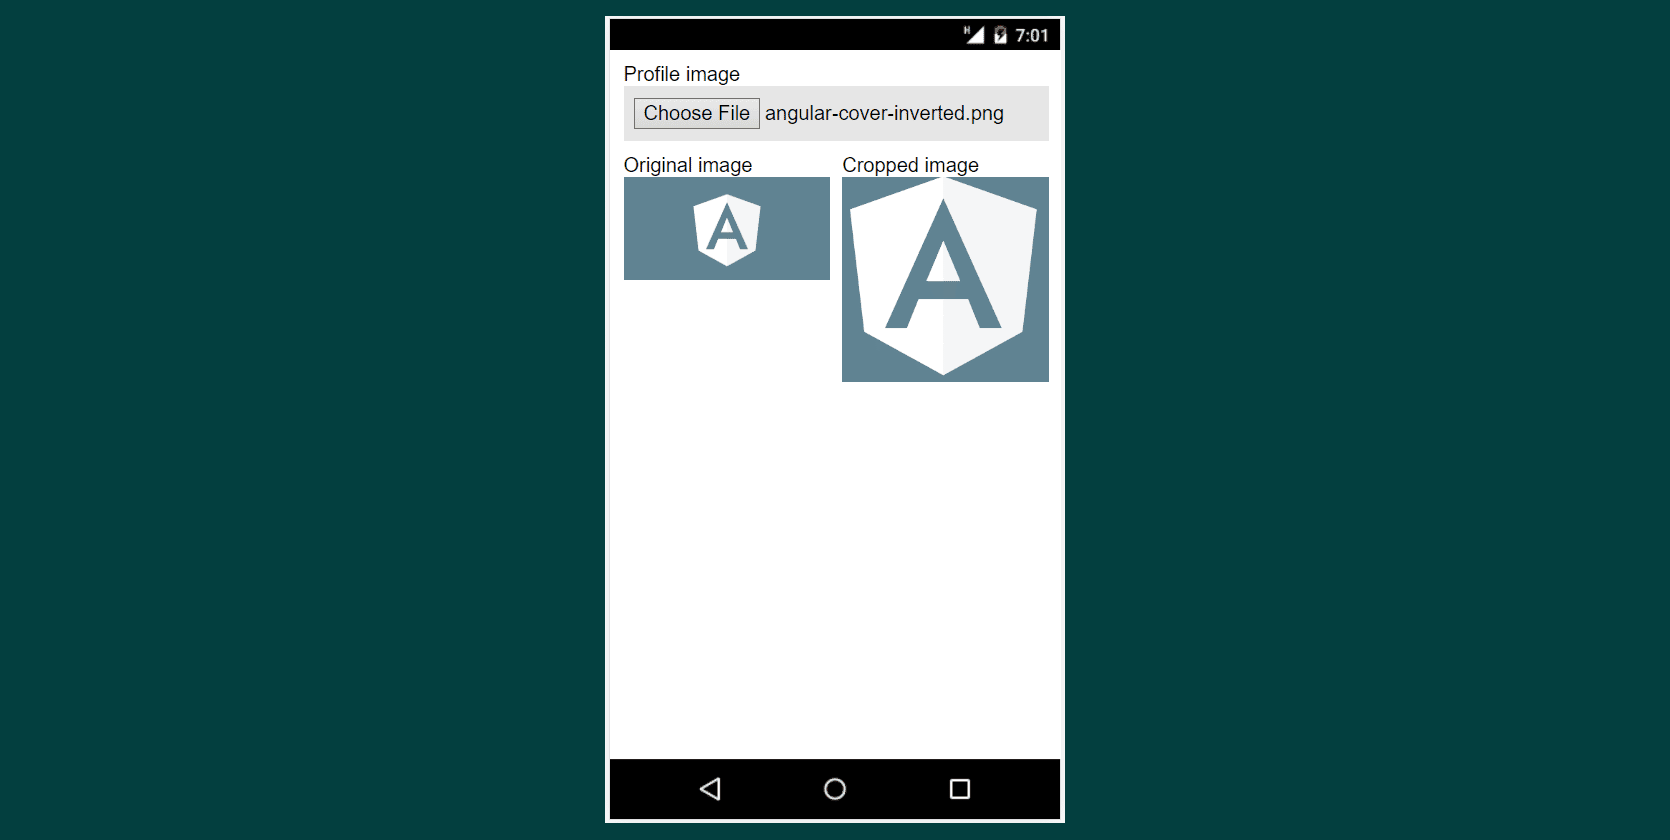
Finally, we use the service in home.page.ts to show the modal after an image is selected. We update home.page.ts adding a function that receives the file input event (from home.page.ts template), converts it to base64 using the ImageService, then passing the result to ImageCropModalService for cropping.
import { Component } from '@angular/core';
import {ImageCropModalService} from '../services/image-crop-modal.service';
import {ImageService} from '../services/image.service';

@Component({
  selector: 'app-home',
  templateUrl: 'home.page.html',
  styleUrls: ['home.page.scss'],
})
export class HomePage {

  constructor(
      private imageCropModalService: ImageCropModalService,
      private imageService: ImageService,
  ) {}

  processFile($event: Event) {
    this.imageService.handleImageSelection($event)
        .subscribe(imageBase64 => {

          this.imageCropModalService.show(imageBase64)
              .then(result => {
                console.log(result);

                // Do something with the result, upload to your server maybe?
              })
              .catch(error => {
                // Handle any errors thrown
                console.log(error);
              })

        });
  }
}